How to use your DSLR out of auto mode

So you took the plunge, bought a DSLR and unless you shoot in auto, your photos just aren’t turning out right? It takes a bit of understanding and a whole lot of practice to get manual shooting down pat.
What are the manual modes?
The first essential element is to understand what the three manual modes are:
- Manual Mode
This is full blown, you’re in control of everything. This mode will enable you to make decisions based on the ISO, aperture and shutter speed, essentially controlling the exposure.
- Aperture Priority
Aperture Priority gives you control of two of the three manual settings – ISO and aperture. Using this setting will let the camera select an appropriate shutter speed to give you the correct exposure.
- Shutter Priority
Shutter Priority gives you control over ISO and the shutter speed. This setting will let the camera select the correct aperture to give your photos the right exposure.
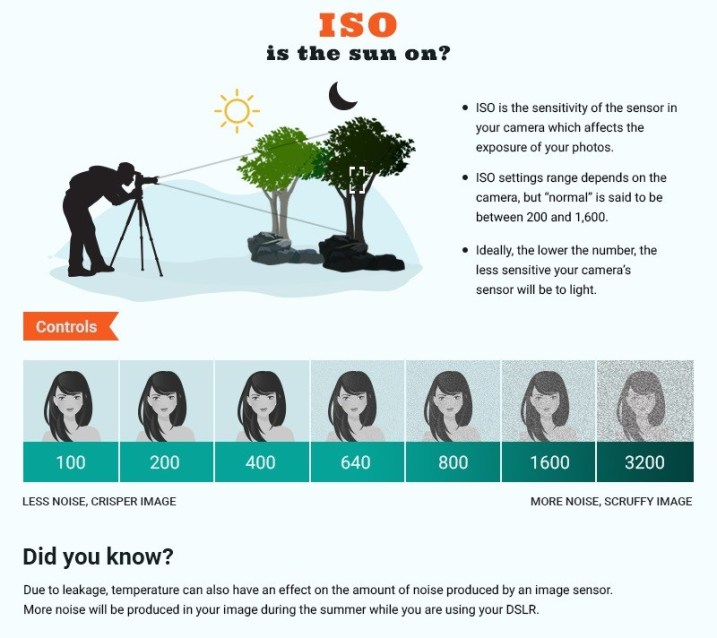
Now it’s not a manual mode, but the ISO is pretty essential to your image quality. No matter what mode you’re shooting on, try to get in the habit of checking/setting your ISO first. If you’re shooting outdoors, you’ll want your ISO to be between 100-400 (if it’s overcast) and if you’re indoors or in a dimly lit room, you’ll want to go anywhere from 400 all the way to 3200 (if necessary. You’ll need to test the upper limits once you’re more comfortable).
You’ll probably notice that you’ll use shutter or aperture priority more than you’ll go full manual. Once you understand what the manual shooting modes are, the next step is to understand how they function.

So what are the functions?
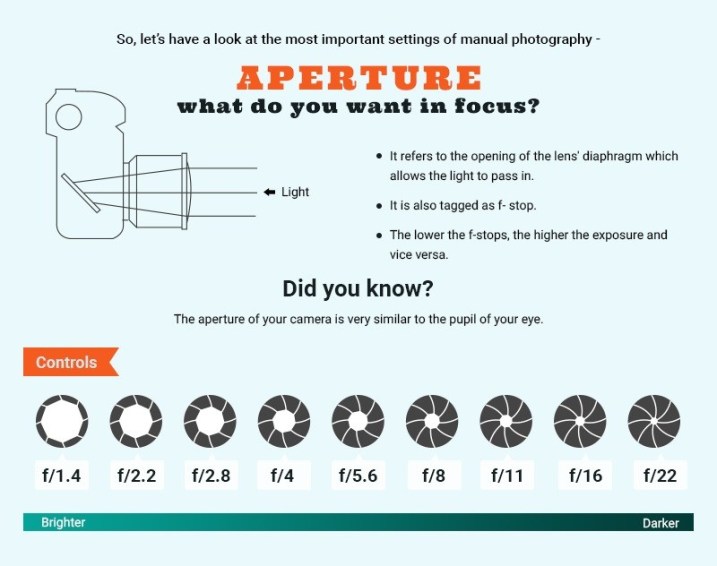
Aperture Priority is for when you want to control the depth of field in your images – e.g. when you want the background blurred or the subject matter to look super sharp. If you want a blurred background, you’ll want to choose a large aperture like f.28 or f1.8, but when you want a larger depth of field or to show maximum detail and sharpness, you’ll want to choose a small aperture like f11 or smaller (depending on your lens).

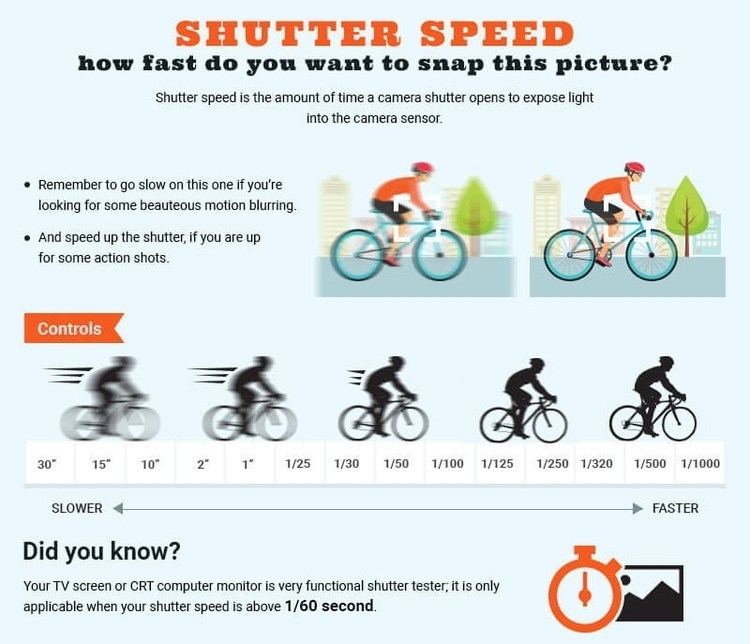
Shutter mode is what you want to use when you need to control motion, either freezing it (for sports or action) or making it blurry (for subjects like flowing water, waterfalls or panning a moving subject). Shutter speed usually ranges from 1/8000th of a second on the fast end (perfect for freezing fast paced action shots!) to 30 seconds on the slow end (great for capturing the flowing motion of water).
Once you’ve had enough practice in both of these modes and gotten the hang of the right ISO settings, it’s time to put your knowledge to use and take control of your camera in full manual mode! Just remember – practice makes perfect!
